
How to grow flowers for borders and containers from seed
by Drucilla James
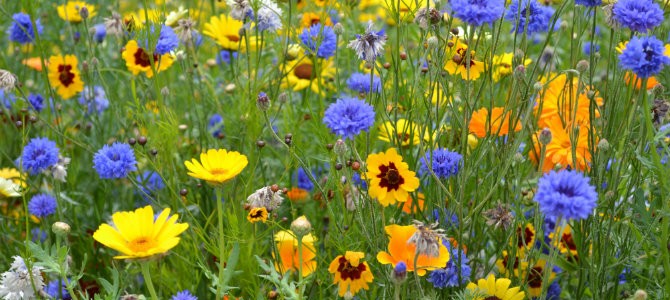
Wonderful displays of vibrant colour, beds of firework brilliance, rare specimens to marvel at and treasures to be acquisitive over – all of these await you. All you need is simple equipment and seeds, to take your containers or flower beds into another dimension. Here is some timely advice to get you sowing.
Why grow from seed?
- Growing plants from seed is much less expensive than buying ready grown plants, especially if you use seed you have collected yourself (see http://www.cityplanter.co.uk/practical/how-to/how-to-save-seed ). From one packet of seed you can grow multiple specimens to pack those borders.
- Growing from seed gives you the opportunity to build a collection of those special plants and new varieties that are difficult to source or cannot be obtained and that will form the eye-catching core of your garden. There is a whole range to choose from…annuals, half hardy annuals, biennials, perennials, or even shrubs and trees.
What to grow
Annuals
Annuals grow quickly and provide an impressive display of colour over a short period of time. They are also very versatile as they can be used for beds and borders or in hanging baskets and pots and they offer a wide range of growth habits from the compact and bushy to climbers and trailing plants. Annuals range from tender to half hardy to hardy. Try: Calendulas, Campanula medium, Cosmos, Dianthus, Digitalis, Eschscholzia, Helianthus, Impatiens, Ipomea, Lathyrus , Nigella, Salvia, Tagetes erecta, Zinnia.
Biennials
Unlike annuals, these need a little more patience and care. Seed is planted in the first year; the seedlings and the plants are then cared for until the second year when they can be planted out- thereafter they will flower and die. If space is short then these are a more difficult choice.
Perennials
Most planting schemes require these to be in large groups and growing from seed offers an opportunity to have a large number of specimens for a relatively small cost. A wide range of perennials can be grown including the usual border plants, ferns, alpines and grasses. Some to try: Aquilegia, Aubretia, Campanula, Festuca (Grass), Gazania, Geraniums, Hellebores, Pelargoniums, Verbena.
Things you’ll need:
- Containers – choose from the following what best meets the needs of the type of seed you are sowing:
- Pots for larger seeds - plastic or biodegradable square pots are the best as they take up less space and they retain more heat at their base. Biodegradeable pots can be planted straight out into the bed or planter;
- Trays for growing large numbers of seedlings;
- Module trays for growing individual seedlings -these can now be bought with a plug of biodegradable material which only needs to be moistened and the seed placed in the cavity provided and then plugged with some of the growing medium.
- Compost -the correct compost is essential for success. There are soil-based and soilless (a must for lime-hating plants)composts. Buy your compost and use it as soon as possible to avoid pests and disease getting into it. Ready-made compost retains moisture as it contains peat or peat-substitute, sand, and it is low in nutrients.
- Compost presser (your hands are as good and let you know if you are compressing the compost too much).
- Dibber and widger. Plant labels or a small spoon can be used, some gardeners use a pocket knife.
- Plant labels and permanent marker or pencil.
- Windowsill propagator or an electrical heated one.
- Plastic bags and elastic bands to fit the size of pots you are going to use.
Step-by-step
Sowing seeds in pots
Pots are ideal if you are only going to grow a few seeds. If you are going to use old pots then ensure they have been thoroughly cleaned and are sterile.
- Fill an 8-13 cm pot with compost, firm it so it is about 1 cm from the rim. Place three larger seeds, individually spaced, in the pot or spread smaller seeds evenly over the compost surface.
- Cover the seeds to their own depth in fine compost which has been sieved through your fingers by gently rubbing it between the thumb and the four fingers. (Too fine material will form a hard pan on the surface and make it difficult for the seedling to break through.)
- For very fine seeds mix them with fine dry silver sand, place in a bag and shake to mix, then using a folded piece of paper to create a groove, place some of the mix in it and tap the paper gently to scatter the seeds on to the compost.
- After sowing, water with a mist sprayer or fine-rose watering can with a sweeping motion. If your compost is dry or you are growing from fine seed, then stand the pot in water until it moistens the surface (not suitable for compost with no loam as the surface will float).
- Label and cover with a clear plastic bag held in place with an elastic band. Place in the correct location for the seeds you are growing.
Sowing seeds in trays
These allow many plants to be grown in a small space but have the disadvantage that they can dry out fairly quickly so need to be watered more regularly. Also, as trays involve pricking out and potting on, do not use them to grow plants that dislike root disturbance.
- Fill the tray with compost, level it off and firm with a compost presser or the base of a jam jar.
- Make shallow rows by pressing a straight edge into the compost.
- Scatter the seed as thinly as possible along the rows.
- Cover the seeds with compost to a depth equal to the seed. Remember very fine seed should not be covered.
- Water the seeds as described for pots.
- Place the tray in a propagator, or in a polythene bag or cover with a sheet of glass or clear Perspex.
Sowing seeds in modules
Large seeds or a number of smaller seeds can be grown in each cell of a module.
- Fill the module tray with compost and level the surface.
- Make a depression in each cell and sow the seed.
- Cover with compost.
The seedlings can be grown on for planting out or potted on, depending on the size of the cells and which plants you are growing.
Sowing seeds in open ground or containers
- Prepare the ground by digging over the surface and then firming it. Rake over the surface to develop a fine tilth, water if necessary.
- In open ground, leave the furrows formed by the rake, scatter the seed thinly and evenly over the prepared area.
- Very lightly rake over the furrows at ninety degrees to the original lines.
- Label and water the area.
For more details see http://www.cityplanter.co.uk/uncategorized/how-to-grow-hardy-annuals
Seeds need the right amounts of water, warmth, air and light to germinate successfully. Once sown in pots or modules, keep your seeds in a propagator or on a windowsill indoors or in a greenhouse – there are even small greenhouses for balconies. Once established seedlings can be potted on or planted out. A small cold frame can provide a half-way house until seedlings are fully hardy.